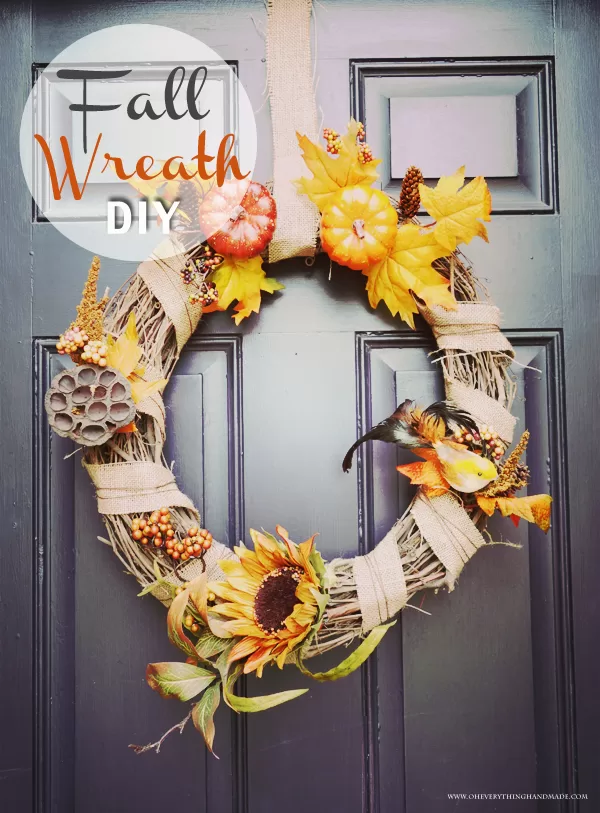
DIY // Autumn Wreath
I have been homesick for the last week or so, basically since the weather started to change here in Texas. Back in Germany it is cold and rainy around this time of year, which reminds me so much of home. Cuddling up on my parents couch with a hot chocolate, or just enjoying the season while shopping along Koenigstrasse in Stuttgart. I really miss my parents and friends. To keep my mind busy, I have been crafting almost every day since we can’t leave the house due to rain or just yucky weather + we are potty training Jasmine and it’s better to stay home the first week or so until she knows when to say that she needs to go.
Today, I love to share a fall/autumn inspired wreath that I made yesterday while it was raining “all day”.
// What you’ll need:
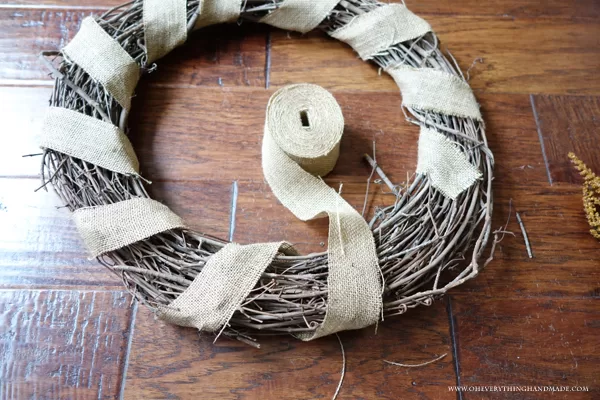
- 18″ plain grapevine wreath (got it at Joann – $4.99)
- 5 Fall inspired decorative pieces (Joann each $1.19)
- 2 inch x 30ft Burlap (Joann $3.49)
- Brown Hemp Cord (Joann $2.99)
- Hot Melt Glue Gun Kit
- Scissor

1. You want to do this on a table or floor, just make sure that you have something underneath your glue gun to catch the dripping glue.
2. Heat your glue gun, and add a good amount of glue to the end of your burlap. When placing it on the wreath, use a thick piece of paper or anything that you can use to press down the burlap so it sticks to the wreath. But remove the paper before it will stick to your burlap, you only want to use the paper so you don’t burn your fingers when pressing down.
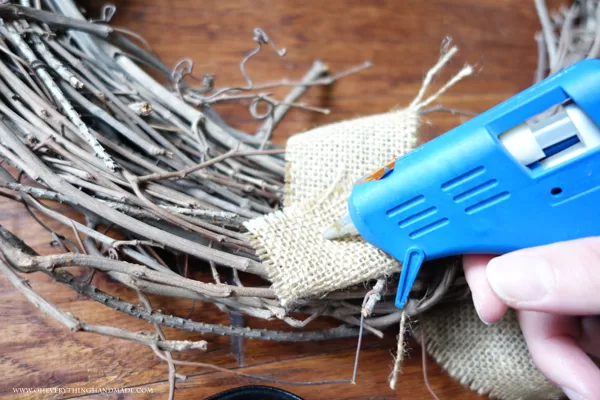
3. Give the glue a minute or two to dry and start wrapping the burlap around your wreath.
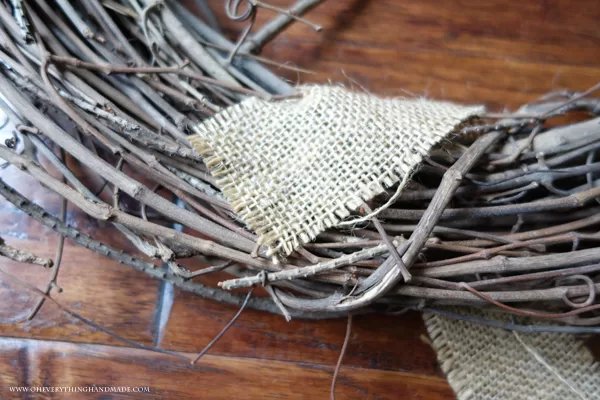
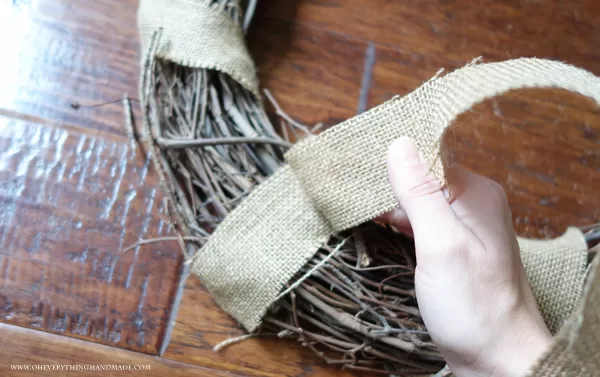
4. End with the wrapping on the backside, cut off the remaining burlap and glue the wrapped part to your wreath as well.
5. Leave some room in between the two burlap ends, for the hanging part! Glue and wrap the burlap in between the other two ends, do not cut the remaining burlap just yet!
6. Now, start adding the little bundles of flowers, pumpkins, birds and leaves (whatever you desire). Pushing them behind and in between the vine and burlap.

7. Wrap the hemp cord around following the burlap, secure the ends with a knot. You can also just tighten the picks by wrapping the cord over some parts of the bundles (where it isn’t visible). I did it that way so I didn’t have to glue the flowers and pumpkins to the vine in case I want to reuse it for another season (spring and summer?). But if you plan on reusing the same fall wreath again, make sure you add some glue underneath each bundle.

8. Now, lets continue with the hanging part of our wreath…
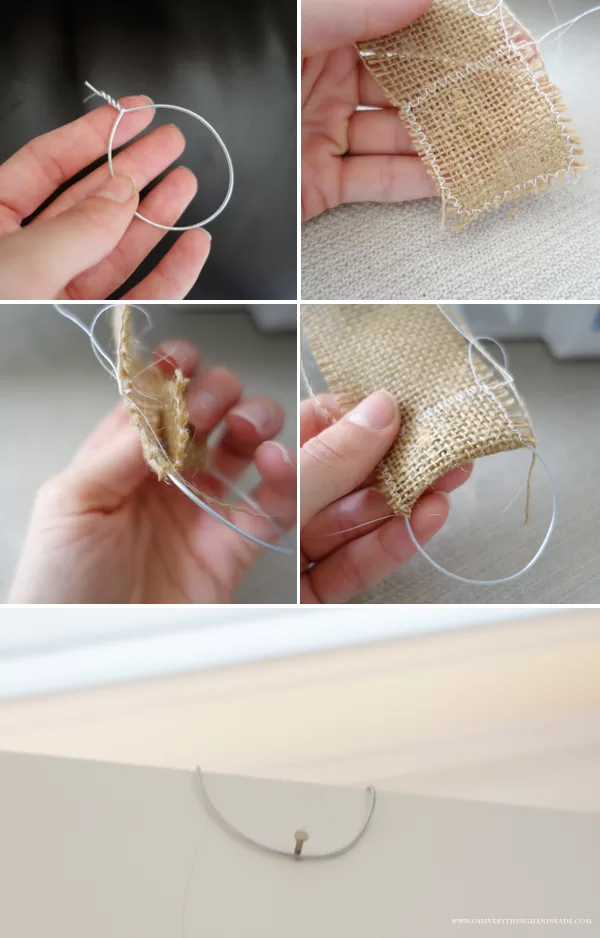
9. I used the sew-on method because I had everything handy, but you can also just make a bow-tie or use a one of these ways, click here.
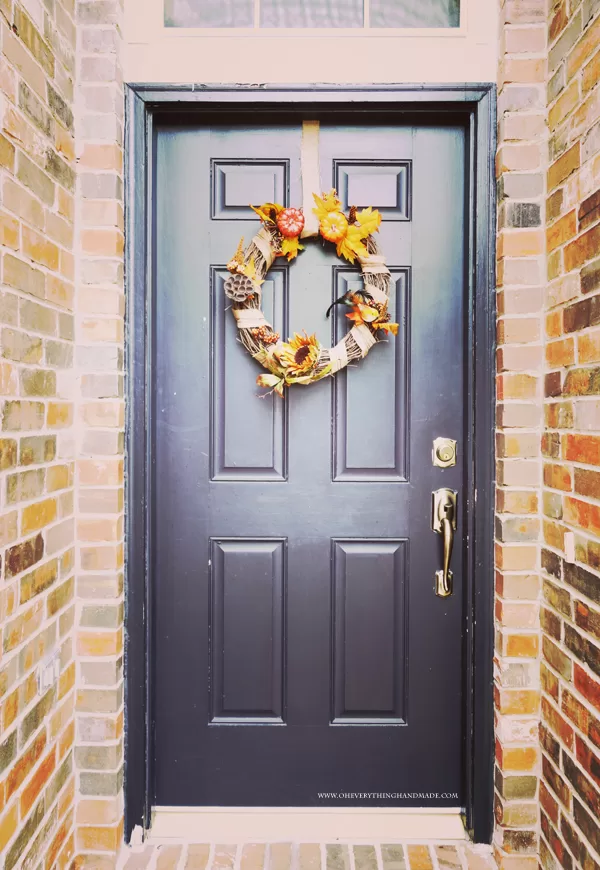
All done! I am so amazed by how different our entry looks after I added the wreath. It was worth the longer drive to our Joann store to get all the things I needed for this project.
Have fun making your own!