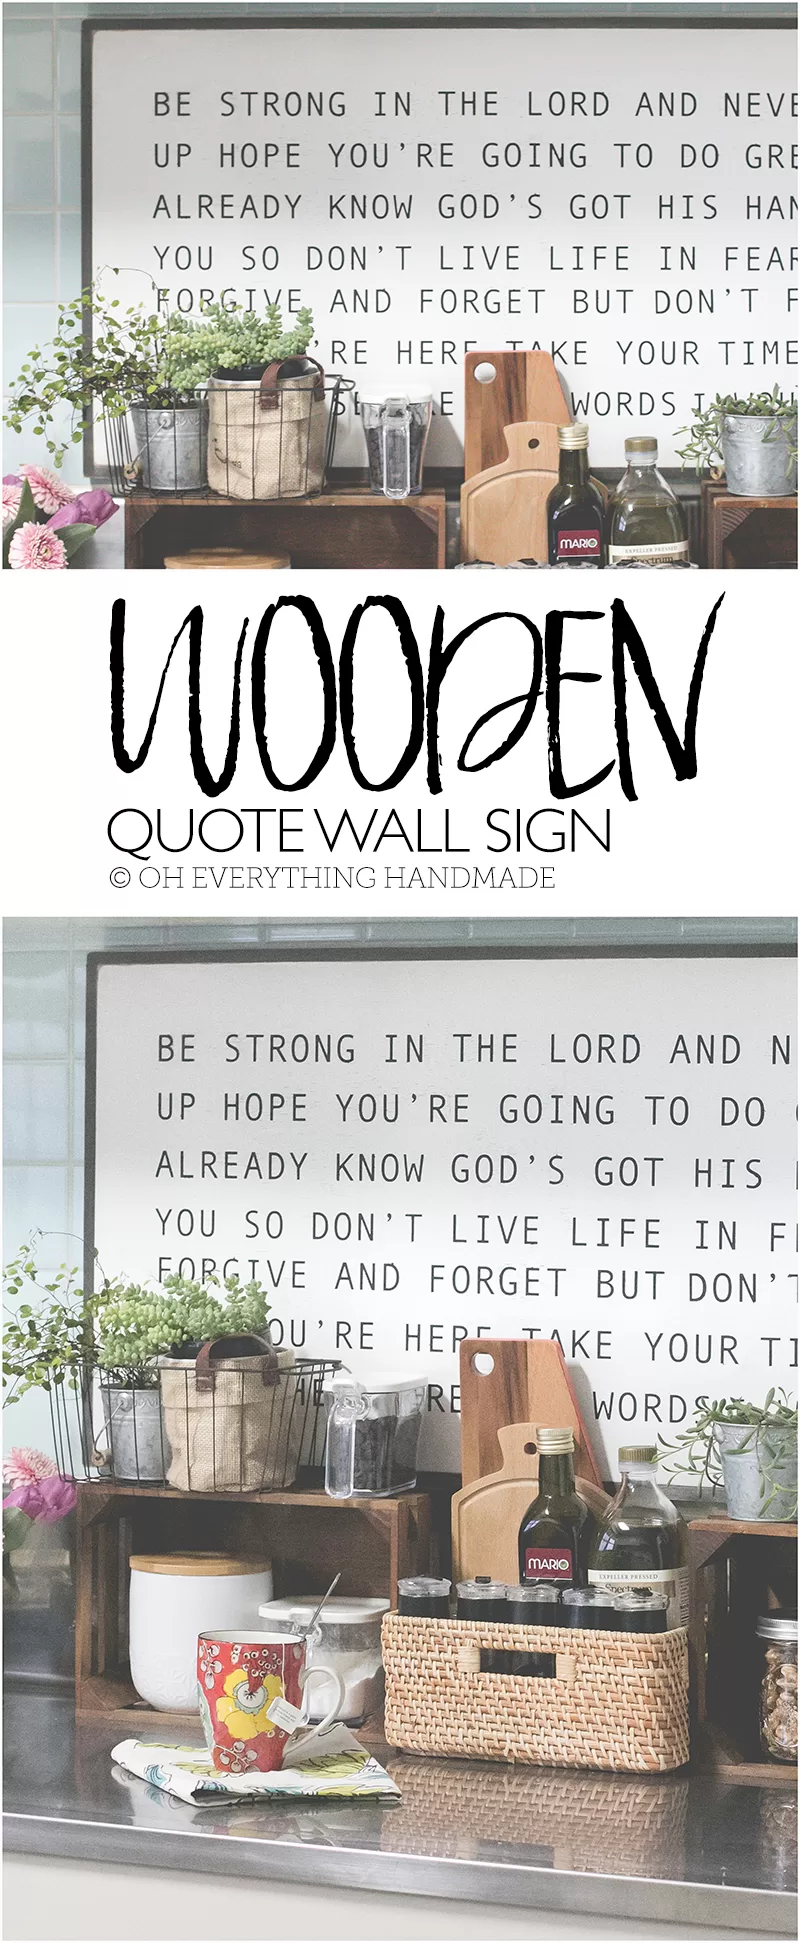
Wooden Quote Wall Sign
I am so glad this week is over! Let me tell you, working from home is not always fun especially not during tax season. But I found some spare time and started my favorite DIY project of all times. The Wooden Quote Wall Sign has been on my to-do list for months, but because I wanted to perfect the look and process it took a bit longer to complete.
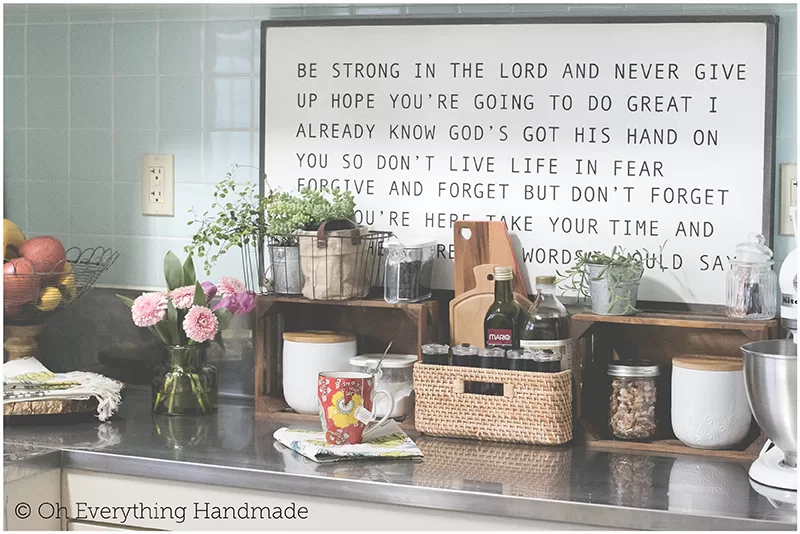
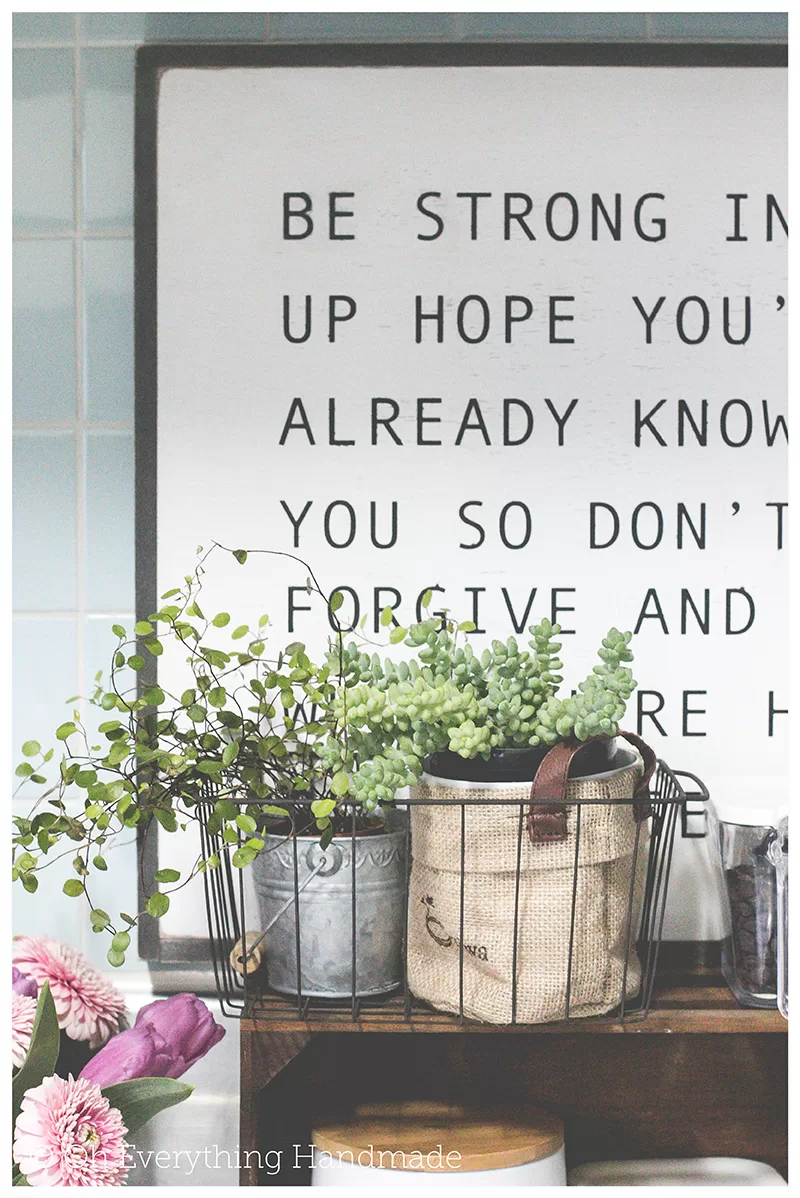
If you are a wooden wall sign lover, you might have seen these quote signs on Pinterest or Etsy. I had previously bought a sign from an Etsy Seller [see my Okinawa Home Tour HERE], but because they are so pricey I decided to make one on my own. There are numerous of ways to finish these signs, I personally love the white & black chalkboard paint look with a dark walnut or espresso-stained frame. Today’s DIY was inspired by that combo, but to make it even sweeter I choose one of my favorite gospel song lyrics to remind me how precious life is and that the Lord loves me and has a plan for each of us.
BE STRONG IN THE LORD AND NEVER GIVE UP HOPE YOU’RE GOING TO DO GREAT I ALREADY KNOW GOD’S GOT HIS HAND ON YOU SO DON’T LIVE LIFE IN FEAR FORGIVE AND FORGET BUT DON’T FORGET WHY YOU’RE HERE TAKE YOUR TIME AND PRAY THESE ARE THE WORDS I WOULD SAY
Wooden Quote Wall Sign
To make this sign I used a leftover piece of 3/4″ thick plywood board, size 17″x34″. Here is a list of all items you need for this project.
|
3/4″ Plywood 17″ x 34″ 2x frame boards – 1″ x 6′ ft
|
Miss Mustard Seed Milk Paint (Farmhouse White) Black Chalk paint or MMSM (Typewriter) Espresso stain
|
9″ x 70″ Removable Vinyl Silhouette machine (I used the Portrait)
|
hammer | pencil | measuring tape | vinyl pick clamps | glue | 1″ nails | foam brush 180 & 200 grit sand paper | electric sander
|
Instructions:
Step 1.
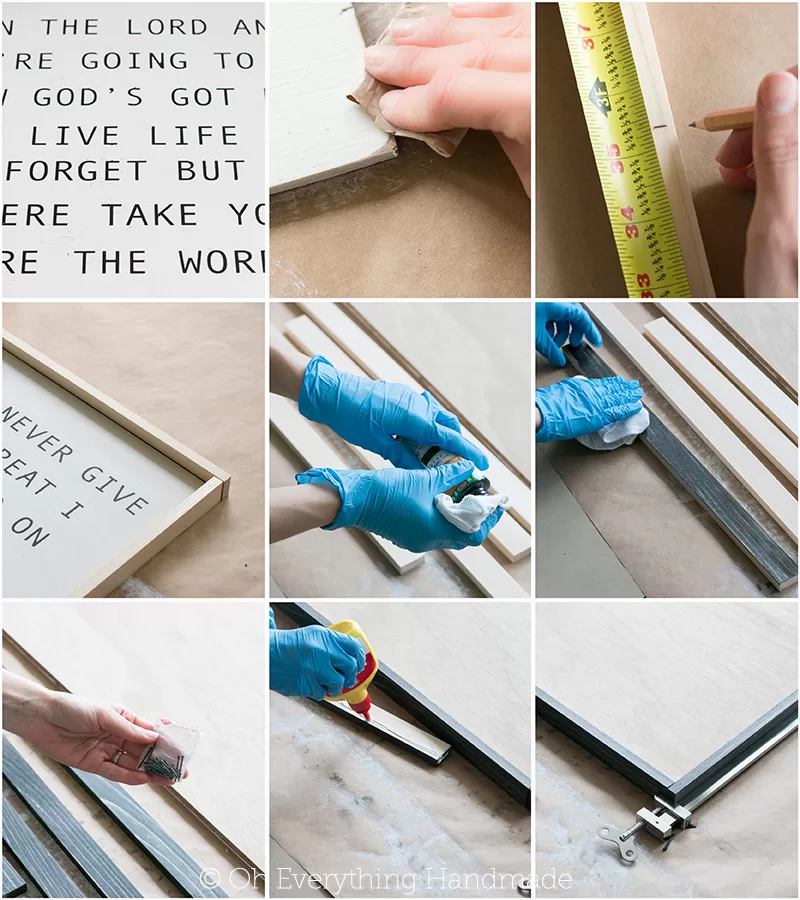
Cut the plywood to 17″ x 34″ or your preferred size. If you do not have the possibility to cut wood at your home, your local home improvement store will cut it for you for free or a small fee.
Step 2.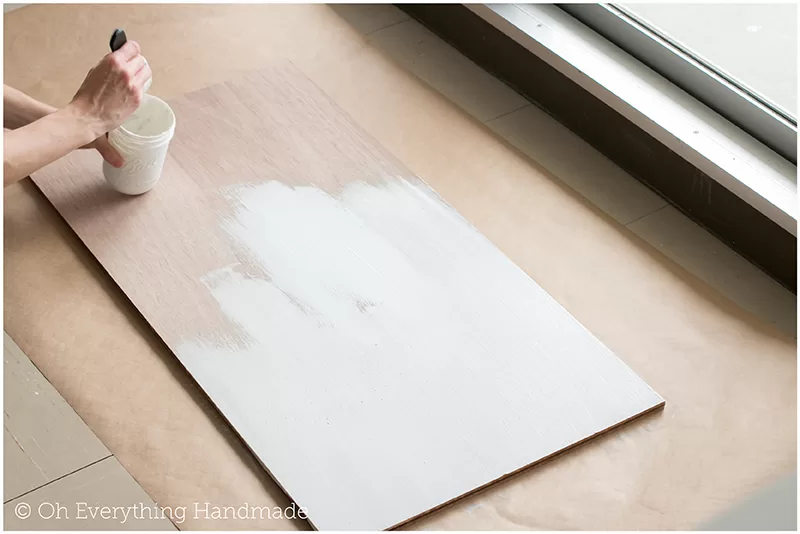
- Sand the plywood with the 180 and the 200 grit sandpaper, this will remove any splinters or imperfections.
- Apply 2-3 coats of white milk paint, and let fully dry.
Step 3.
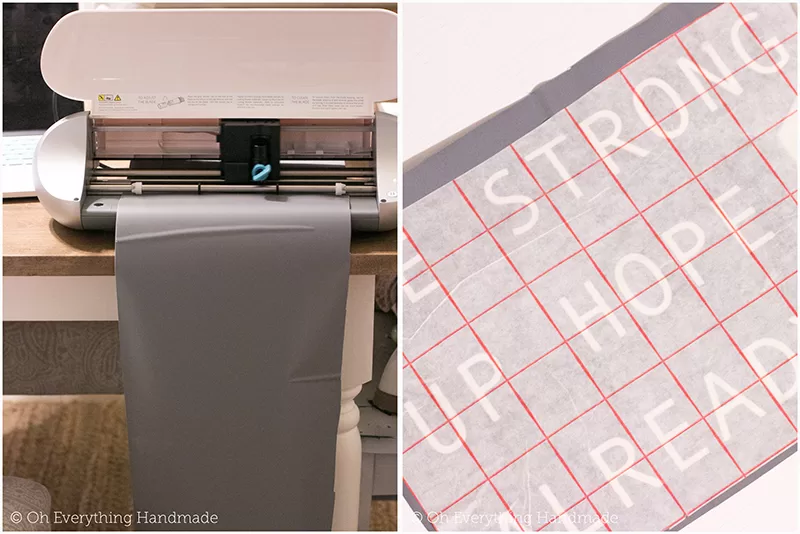
Cut the quote or lyrics in my case onto vinyl. I had to play around a little bit with the settings to get most of the lyrics onto a 9″x 34″ long vinyl roll. I printed the first 4 lines on one sheet and on the second sheet I was able to fit the rest. You can also find good instructions for longer vinyl cutting [here].
Step 4. & Step 5.

After the vinyl has been applied to the board, remove any air bubbles especially those surrounding letters, this can easily be done with a credit card or a rubber spatula.
Use 2 coats of very thin layers of chalkboard paint, only dab the paint onto the letters otherwise, the paint might leak underneath the vinyl.
Step 6.
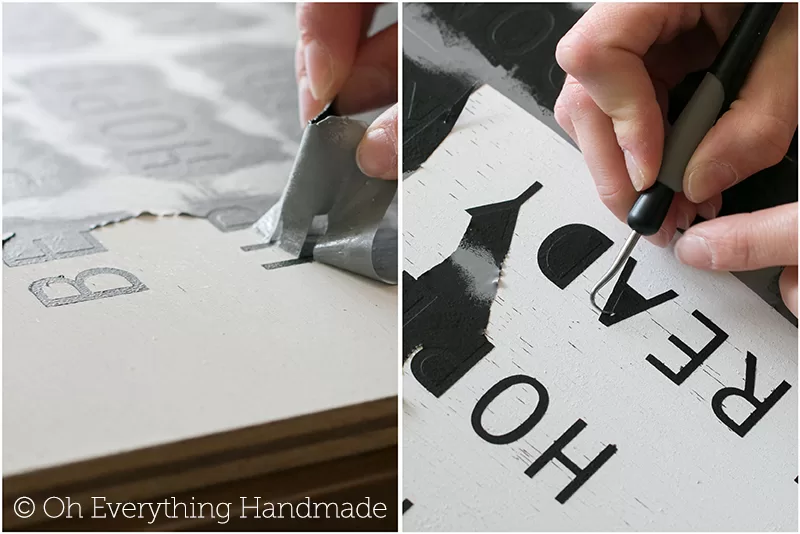
Let the paint completely dry and start removing the vinyl carefully. Use a pick to lift small pieces of vinyl (as seen in the image above).
Step 7. | 8. | 9. & 10.
Let the paint harden and dry for 4-8h
Use the fine 200 grit sandpaper and distress the edges and surface, be careful with the letters. Some of the chalk paint will leave streaks if sanded over, so try a test area before you actually sand over any letters.
Next cut the frame boards to fit around the plywood board.
Stain each frame piece and let dry.
Glue and clamp the boards to the plywood to keep in place.
Step 11. | 12. | 13.
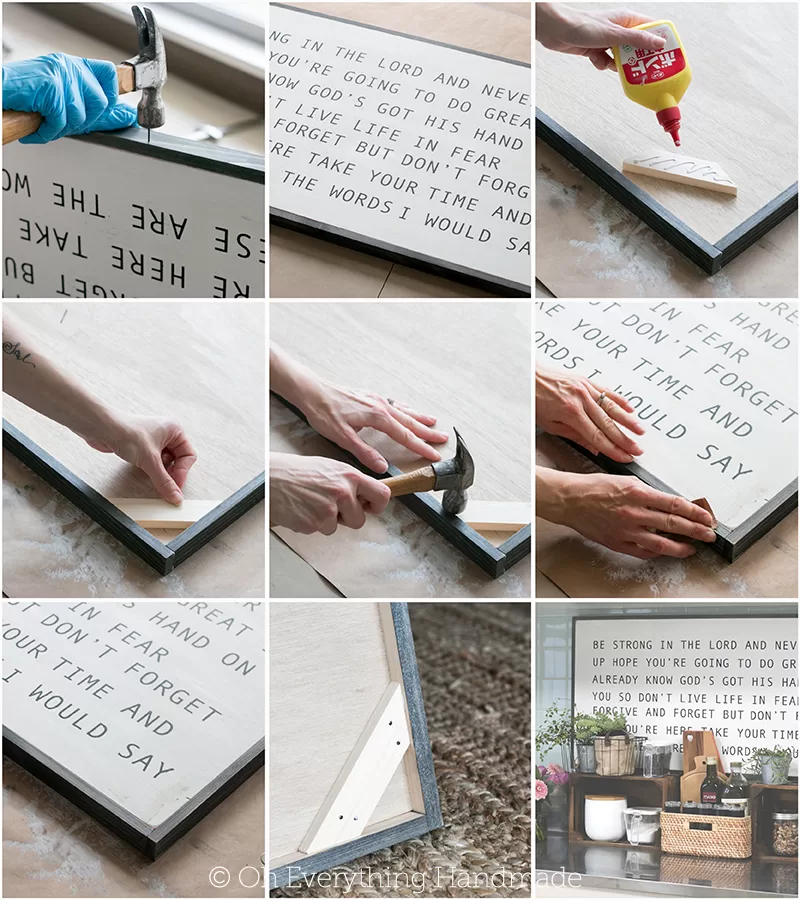
Use the 1″ nails to give the frame extra security.
Turn the sign over, and glue and nail 45º degree brackets to each corner.
Once done distress the frame and wipe off any dust.
That’s it!
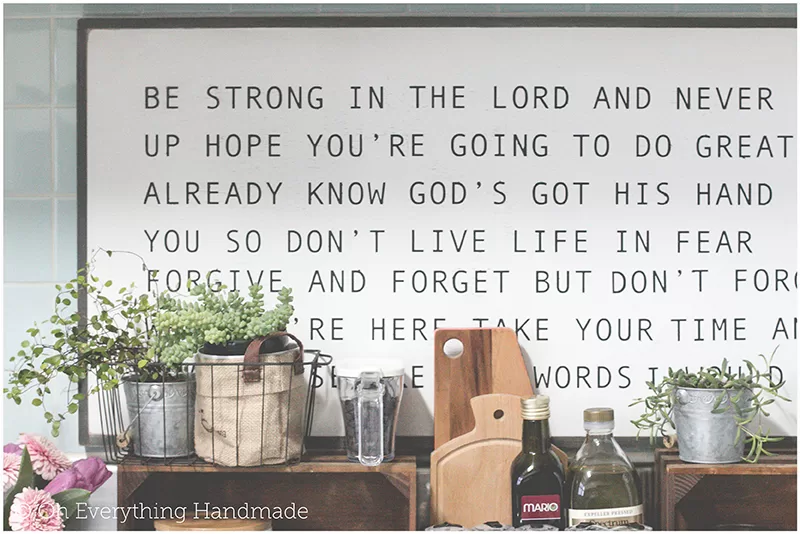
This beauty is now displayed in my kitchen where I can read the beautiful lyrics every day. Hope you enjoyed the tutorial and make on for yourself.
// Pin for later //